I hope you read my last post about BGP in networking and why we need it in the first place. This blog post will explain the BGP Neighborship establishment process. We’ll cover the following topics:
- What is BGP Neighbor Establishment Process, and why do we need it?
- The step-by-step BGP neighbor Establishment and Maintenance Process.
- How to establish BGP neighborship on Cisco Routers?
- BGP Neighborship Configuration on Cisco Router.
1. What is BGP Neighbor Establishment Process, and why do we need it?
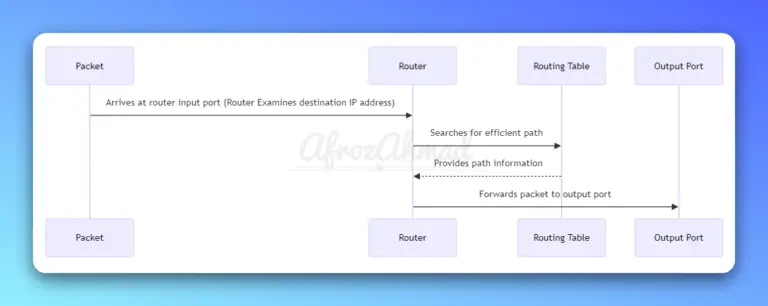
The BGP neighborship establishment process allows two routers intended to use BGP in different or the same autonomous systems (ASs) to exchange network information and establish paths for efficiently routing traffic across the private network or the vast Internet. This process is essential for networks spread across multiple autonomous systems, such as the Internet.
Without this BGP neighborship process, BGP-speaking routers would be unable to communicate with one another or find routes effectively.
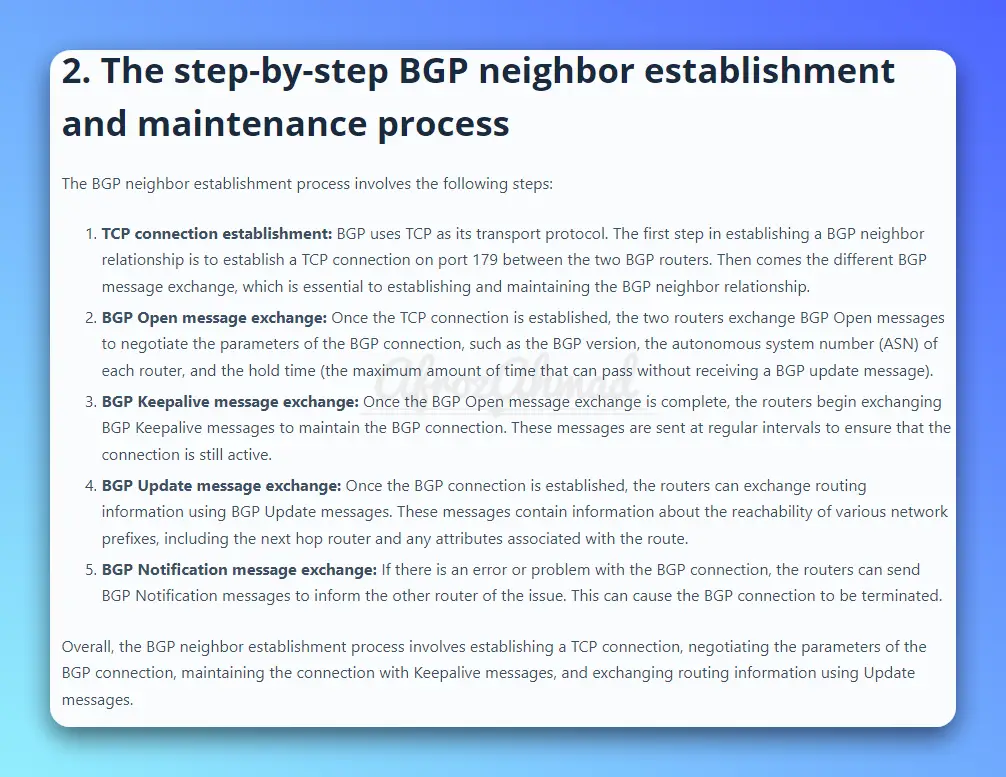
2. The step-by-step BGP neighbor establishment and maintenance process
The BGP neighbor establishment process involves the following steps:
- TCP connection establishment: BGP uses TCP as its transport protocol. The first step in establishing a BGP neighbor relationship is to establish a TCP connection on port 179 between the two BGP routers. Then comes the different BGP message exchange, which is essential to establishing and maintaining the BGP neighbor relationship.
- BGP Open message exchange: Once the TCP connection is established, the two routers exchange BGP Open messages to negotiate the parameters of the BGP connection, such as the BGP version, the autonomous system number (ASN) of each router, and the hold time (the maximum amount of time that can pass without receiving a BGP update message).
- BGP Keepalive message exchange: Once the BGP Open message exchange is complete, the routers begin exchanging BGP Keepalive messages to maintain the BGP connection. These messages are sent at regular intervals to ensure that the connection is still active.
- BGP Update message exchange: Once the BGP connection is established, the routers can exchange routing information using BGP Update messages. These messages contain information about the reachability of various network prefixes, including the next hop router and any attributes associated with the route.
- BGP Notification message exchange: If there is an error or problem with the BGP connection, the routers can send BGP Notification messages to inform the other router of the issue. This can cause the BGP connection to be terminated.
Overall, the BGP neighbor establishment process involves establishing a TCP connection, negotiating the parameters of the BGP connection, maintaining the connection with Keepalive messages, and exchanging routing information using Update messages.
3. How to establish BGP neighborship on Cisco Routers?
Steps involved in establishing BGP neighborship, including the elements involved and key protocols:
- The command “neighbor 100.100.100.2 remote-as 200” configures a BGP neighbor under the “router BGP AS-number” process. This Command specifies the IP address and AS number of the neighboring router.
- If the AS numbers match between peers (for example, if the local and neighboring BGP routers are in AS 200), then the session is iBGP; otherwise, it is eBGP. This rule is usually applied across all vendors except Juniper, like Cisco, Nokia, etc.
- The local router initiates a TCP session to 100.100.100.2 on DST port 179. The source port can be any port between 1-65,535.
- By default, the source IP is configured on the outgoing interface. However, this can be manually changed with the “neighbor update-source” command.
- Recursive lookups are used to find the outgoing interface to the destination.
- Unexpected BGP sessions will be refused unless specific parameters match between neighbors, including SRC/DST IP addresses, DST ports, AS numbers, and authentication (if configured).
Important Tips:
- You can use “telnet (peer ip) 179 / source (interface)” to test connectivity and check whether port 179 and the source ip are allowed to establish BGP peering.
- You can also use “show TCP brief” on cisco routers to check all TCP sessions the local router has established, including their port numbers, IPs, states, etc.
- It is important to know the BGP states, which go hand in hand with when the BGP neighborship process happens.
4. BGP Neighborship Configuration on Cisco Routers
R1 in AS 100 is trying to establish BGP peering with R2 in AS 200 through their directly connected Fast Ethernet 0/0 interface.
R1 configuration:-
router BGP 100Neighbor 100.100.100.2 remote-as 200 --> Command initiates BGP connection and identifies whether the connection is iBGP or eBGP.Neighbor 100.100.100.2 update-source Fa0/0 --> In case you want to change the source interface for the TCP session that carries BGP traffic. By default, it will take the outgoing interface after doing a recursive lookup.
R2 configuration:-
router BGP 200neighbor 100.100.100.1 remote-as 100 --> Command initiates BGP connection and identifies whether the connection is iBGP or eBGP. In this case, it is eBGP.Neighbor 100.100.100.1 update-source Fa0/0 --> In case you want to change the source interface for the TCP session that carries BGP traffic. By default, it will take the outgoing interface after doing a recursive lookup.
Border Gateway Protocol (BGP) is a standardized exterior gateway protocol designed to exchange routing and reachability information among autonomous systems (ASes) on the Internet. BGP is often used to establish routing between different Internet Service Providers (ISPs) and to provide inter-AS routing.
Conclusion
This blog post has explained the basics of the BGP neighborship establishment process and how to configure it. Network engineers need to understand BGP neighborship because it lets different networks share information and send traffic between them.
- Best WiFi 7 Mesh Systems (2026) — Tested & Ranked for Multi-Gig Homes - April 28, 2026
- Best Routers for Verizon FiOS (2026) — WiFi 7 & Mesh Picks Tested - April 13, 2026
- Best 2.5GbE Switches for Home Lab (2026) — Tested & Verified - April 8, 2026