Connecting a Nanit baby monitor to hotel WiFi can be a tricky process, as hotel networks often have unique security protocols and login methods that aren’t as straightforward as home networks. However, with some preparation and the right approach, you can successfully connect your Nanit to ensure your baby monitor is functioning smoothly during your stay.
Here’s a current, simplified path on how to connect your Nanit to hotel WiFi: start in the Nanit app and attempt a direct setup first—many hotel and open networks now work, including those with captive portals where the app redirects you to complete login. If the network blocks IoT devices or the portal doesn’t load, use a travel router or your phone’s hotspot as reliable fallbacks.
Key Takeaways
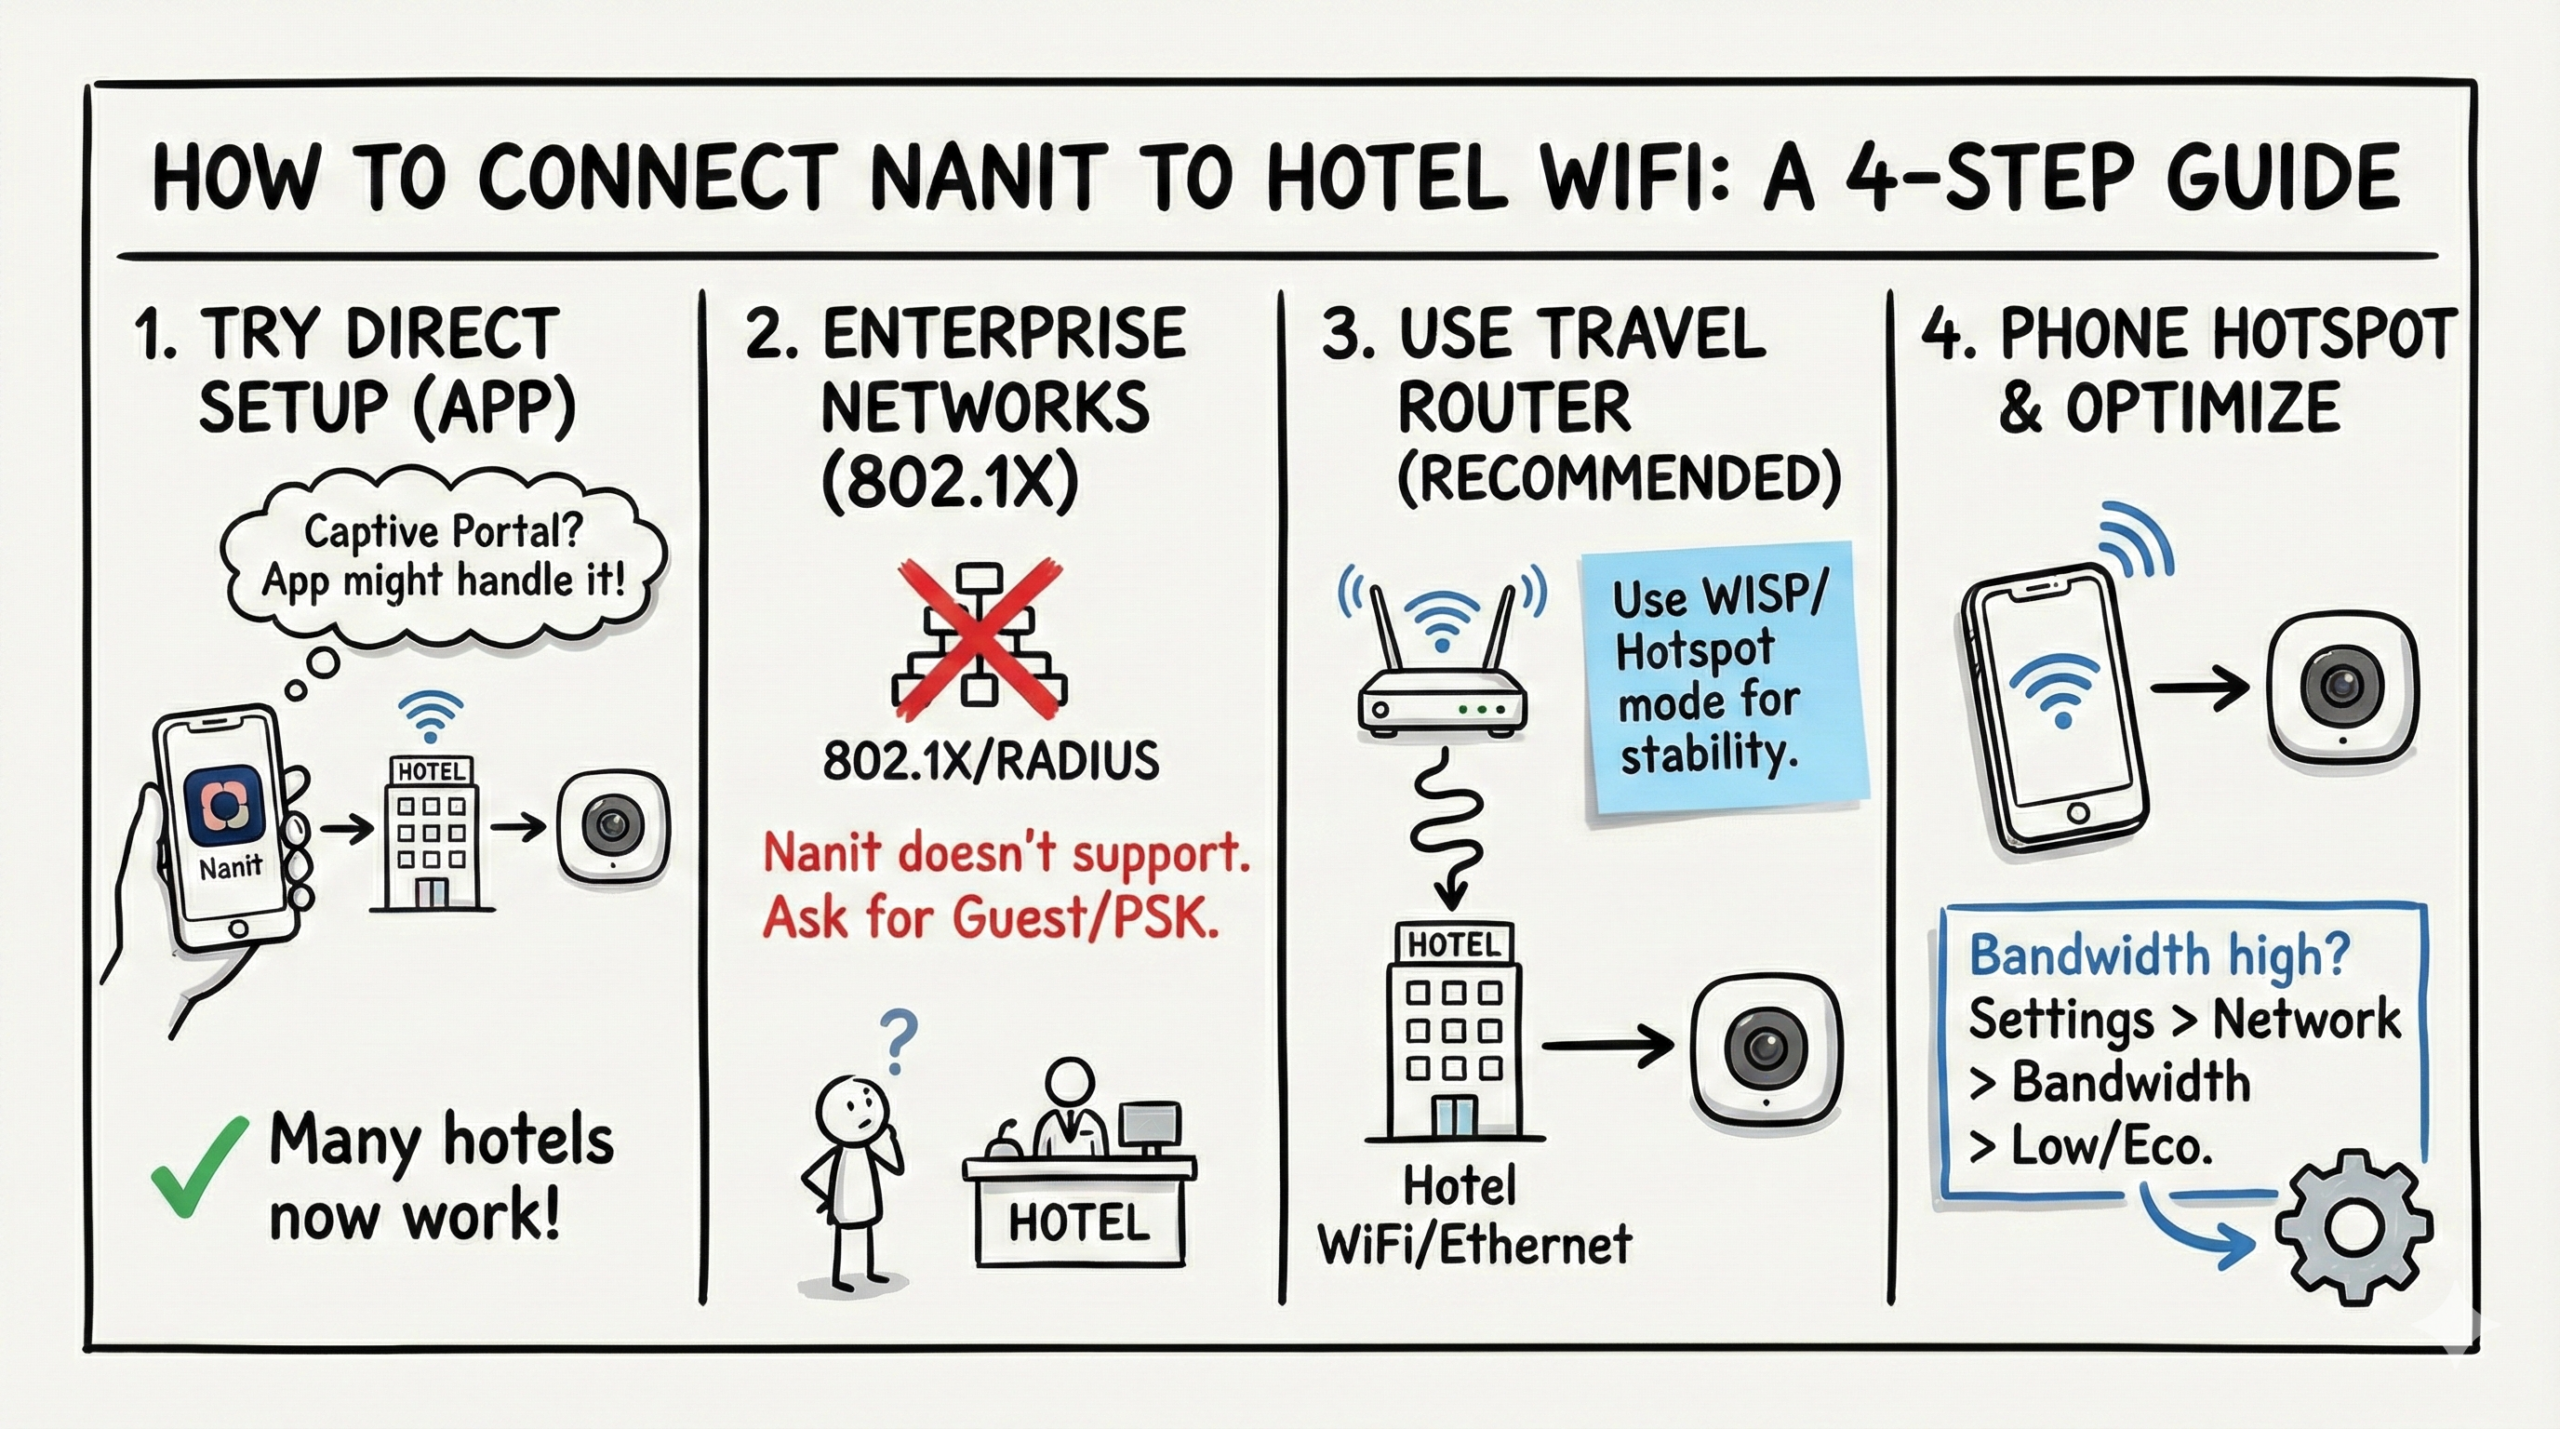
- ✅ Many hotels now work: start pairing in the Nanit app; if there’s a captive portal, the app can redirect you to sign in, then finish setup.
- 📶 Bands: Original Nanit works best on 2.4 GHz; Nanit Plus/Pro often perform best on 5 GHz (you can switch bands in Settings > Network).
- 🚫 Enterprise networks: Nanit doesn’t support 802.1X/RADIUS. Ask for a guest/PSK network or use a travel router.
- 📡 If direct setup fails, use a travel router (WISP/Hotspot mode) or your phone’s hotspot. If the room has Ethernet, feed it into the travel router’s WAN for extra stability.
- ⚙️ Bandwidth: For Best/High quality, plan for ~1.536 Mbps upload and ~1 Mbps download; lower usage by setting bandwidth to Low/Eco in the app if needed.
- 🔐 Security: Use a VPN on your phone/laptop, but avoid routing the camera itself through a VPN, which can break connectivity.
Understanding the Challenges with Hotel WiFi
Hotel WiFi networks typically involve a captive portal—a web page that requires users to log in with credentials, agree to terms of service, or enter a room number. These are designed for devices with web browsers. Nanit can now pair on many hotel/open networks by redirecting you to the portal during setup. Some hotel networks still block IoT devices or limit ports, in which case a travel router or hotspot is the best workaround.
Why Captive Portals Are a Problem?
- Browser flow: The Nanit app can now open the hotel’s portal during pairing. Some portals still won’t authorize IoT devices after login, causing failures.
- Network security: Enterprise/802.1X credentials aren’t supported on Nanit. Request a guest PSK SSID or use a travel router.
- Bandwidth limits: Peak hours can cause buffering. Adjust Nanit’s bandwidth setting to Low/Eco if the network is congested.
Steps to Connect Nanit to Hotel WiFi
1. Initial Setup
Before attempting to connect the Nanit to a hotel’s WiFi, ensure that your device is fully updated. Check that your Nanit app and the camera’s firmware are up-to-date, which can enhance compatibility with different network environments. If you have the original Nanit, prefer 2.4 GHz for stability; if you have Nanit Plus/Pro, 5 GHz often provides the best performance and can be selected in Settings > Network.
2. Connecting Nanit Directly to Hotel WiFi
If you want to try connecting your Nanit directly to the hotel WiFi, follow these steps:
Put Nanit in Pairing Mode:
- Follow the instructions in the Nanit app to place your camera in pairing mode.
Connect Your Smartphone to the Hotel WiFi:
- Go to your phone’s WiFi settings and connect to the hotel’s WiFi network.
- If a portal appears, complete the sign‑in. During Nanit setup, the app may redirect you to the same portal to authorize the camera.
Open the Nanit App:
- Within the app, follow the standard setup process. Select the hotel network when prompted and complete any portal redirect if shown.
- If the hotel blocks IoT devices or the portal won’t authorize, proceed to the travel router or hotspot options below.
Note: This method now works at many properties, but some networks still restrict devices without full browser capabilities.
3. Using a Travel Router
A travel router is one of the most reliable methods to connect your Nanit to hotel WiFi. It works by creating a private WiFi network in your room and handling the hotel’s captive portal sign‑in. Here’s how to set it up:
Purchase a Travel Router:
- Choose a model with Hotspot/WISP mode and dual‑band support. Examples include GL.iNet Beryl AX (GL‑MT3000), GL.iNet Slate AX (GL‑AXT1800), or TP‑Link AC750 (TL‑WR902AC).
Connect the Travel Router to the Hotel WiFi:
- Plug the router into a power source in your hotel room.
- Use a laptop or smartphone to connect to the router’s default WiFi network.
- Open a browser and access the router’s configuration page (usually a local IP address like 192.168.0.1).
- Set the router to Hotspot/WISP mode and connect it to the hotel WiFi. Complete any captive portal login in the router’s management flow.
Create a New Private Network:
- Once connected, the travel router will create a secure WiFi network in your room.
- Name this network something easy to recognize (e.g., “Nanit_Room”).
Use Ethernet if Available:
- If your room has an Ethernet jack, connect it to the travel router’s WAN/LAN port for a more stable backhaul.
Connect Nanit to the New Network:
- Open the Nanit app and set up your camera, selecting the new private network created by your travel router.
Some of the best Travel Routers:


4. Using Your Smartphone as a Hotspot
If the hotel WiFi proves too difficult to navigate or if you’re concerned about security, you can use your smartphone as a mobile hotspot:
Enable Hotspot on Your Phone:
- Go to your phone’s settings and turn on the mobile hotspot feature.
- Set up a network name (SSID) and a secure password.
Connect Nanit to the Hotspot:
- In the Nanit app, begin the setup process and select your phone’s hotspot network when prompted to choose a WiFi connection.
Consideration: Be mindful of your data plan, as live video streaming from the Nanit can consume a significant amount of data.
5. Contacting Hotel IT Support
If you’re still unable to connect, reaching out to the hotel’s IT support team might help. Here are some things to ask:
- MAC Address Registration: Request the hotel to register your Nanit’s MAC address directly on their network. This can sometimes bypass the need for a captive portal.
- Private WiFi Networks: Ask if the hotel can provide a private network or a way to connect devices that do not support web-based logins. If they only offer 802.1X (enterprise) access, request a guest/PSK SSID.
6. Using an Ethernet Cable
Some hotel rooms may have Ethernet ports, which can provide a more direct and often faster connection. Nanit cameras connect via Wi‑Fi and do not support Ethernet directly, but you can use Ethernet as the hotel backhaul for your travel router.
Use Ethernet with a Travel Router:
- Plug one end of the Ethernet cable into the wall port and the other into your travel router’s WAN/LAN port, then connect Nanit to the router’s private Wi‑Fi.
Troubleshooting Tips
Even with the right tools, things can go wrong. Here are some additional tips to troubleshoot common issues:
- Check Firmware and App Updates: Make sure both your Nanit camera and app are running the latest software versions before attempting to connect.
- Power Cycling: If the Nanit fails to connect, try restarting both the camera and your phone or travel router.
- Signal and Band: Move the camera for better signal and try switching between 2.4 GHz and 5 GHz if your model supports it.
- Captive Portal Handling: Traditional WiFi extenders often fail behind captive portals. Use a travel router with WISP/Repeater mode that can complete the portal login.
- Bandwidth Settings: If video stutters on hotel WiFi, reduce Nanit’s bandwidth to Low/Eco in the app.
Important Considerations
Security Risks
Connecting to open or shared networks like those in hotels poses security risks. Here are some precautions:
- Avoid Sensitive Actions: Do not access personal or financial information over hotel WiFi.
- Use a VPN: Consider using a Virtual Private Network (VPN) on your phone or laptop for an added layer of security, but avoid routing the Nanit camera’s traffic through a VPN on your router as it may hinder connectivity.
- Monitor Data Usage: Be aware of the data your Nanit might use, especially on metered connections.
Bandwidth and Stability
For Best/High quality, Nanit typically operates well with about 1.536 Mbps upload and ~1 Mbps download. Hotel WiFi networks can be unpredictable, and during high-traffic periods, you might experience lag or disconnections. If needed, set bandwidth to Low/Eco in the app to reduce usage. Always have a backup monitoring solution in place, such as checking in person periodically or using audio monitors if video is not essential.
Alternative Monitoring Options
If connecting Nanit proves too challenging, consider alternative monitoring methods:
- Use a Traditional Audio Monitor: If you have a baby monitor with a receiver, it might work better in a hotel setting.
- Check on Baby Directly: Sometimes, the simplest solution is to physically check on your baby more frequently.
Conclusion
Connecting your Nanit baby monitor to hotel WiFi is more achievable than before: start pairing in the app and complete any captive portal login when prompted. If the network blocks IoT devices, a travel router (with optional Ethernet backhaul) or a mobile hotspot provides a dependable alternative. Prioritize security and have a backup plan in case the connection is unreliable. Safe travels!
FAQs
1. Why can’t I connect my Nanit directly to the hotel WiFi?
Many hotels now work with Nanit because the app can redirect to the captive portal during setup. If your hotel still blocks IoT devices after login or uses enterprise 802.1X, direct connection may fail.
2. Is it safe to connect my Nanit to hotel WiFi?
It’s possible but less secure than home networks. Use a travel router for a private SSID and a VPN on your phone or laptop. Don’t route the camera itself through a VPN, as it can impact connectivity.
3. What if the hotel WiFi is too slow?
For Best/High quality, aim for ~1.536 Mbps upload and ~1 Mbps download. If speeds are lower, switch Nanit’s bandwidth to Low/Eco or use a smartphone hotspot.
4. Can the hotel help me connect my Nanit?
Yes. Ask them to register your Nanit’s MAC address or provide a guest/PSK network. If they only offer 802.1X enterprise WiFi, use a travel router.
5. What should I do if none of these methods work?
If all else fails, consider alternative monitoring methods such as using an audio monitor or physically checking on your baby regularly.
- pfSense 10G Home Lab Setup: Complete Hardware Guide (2026) - April 1, 2026
- Best Budget Home Lab Setup Under $300 (2026): Complete Starter Stack - March 30, 2026
- Best Modems for Spectrum: Top DOCSIS 3.1 Picks That Actually Work - March 28, 2026