TL;DR;
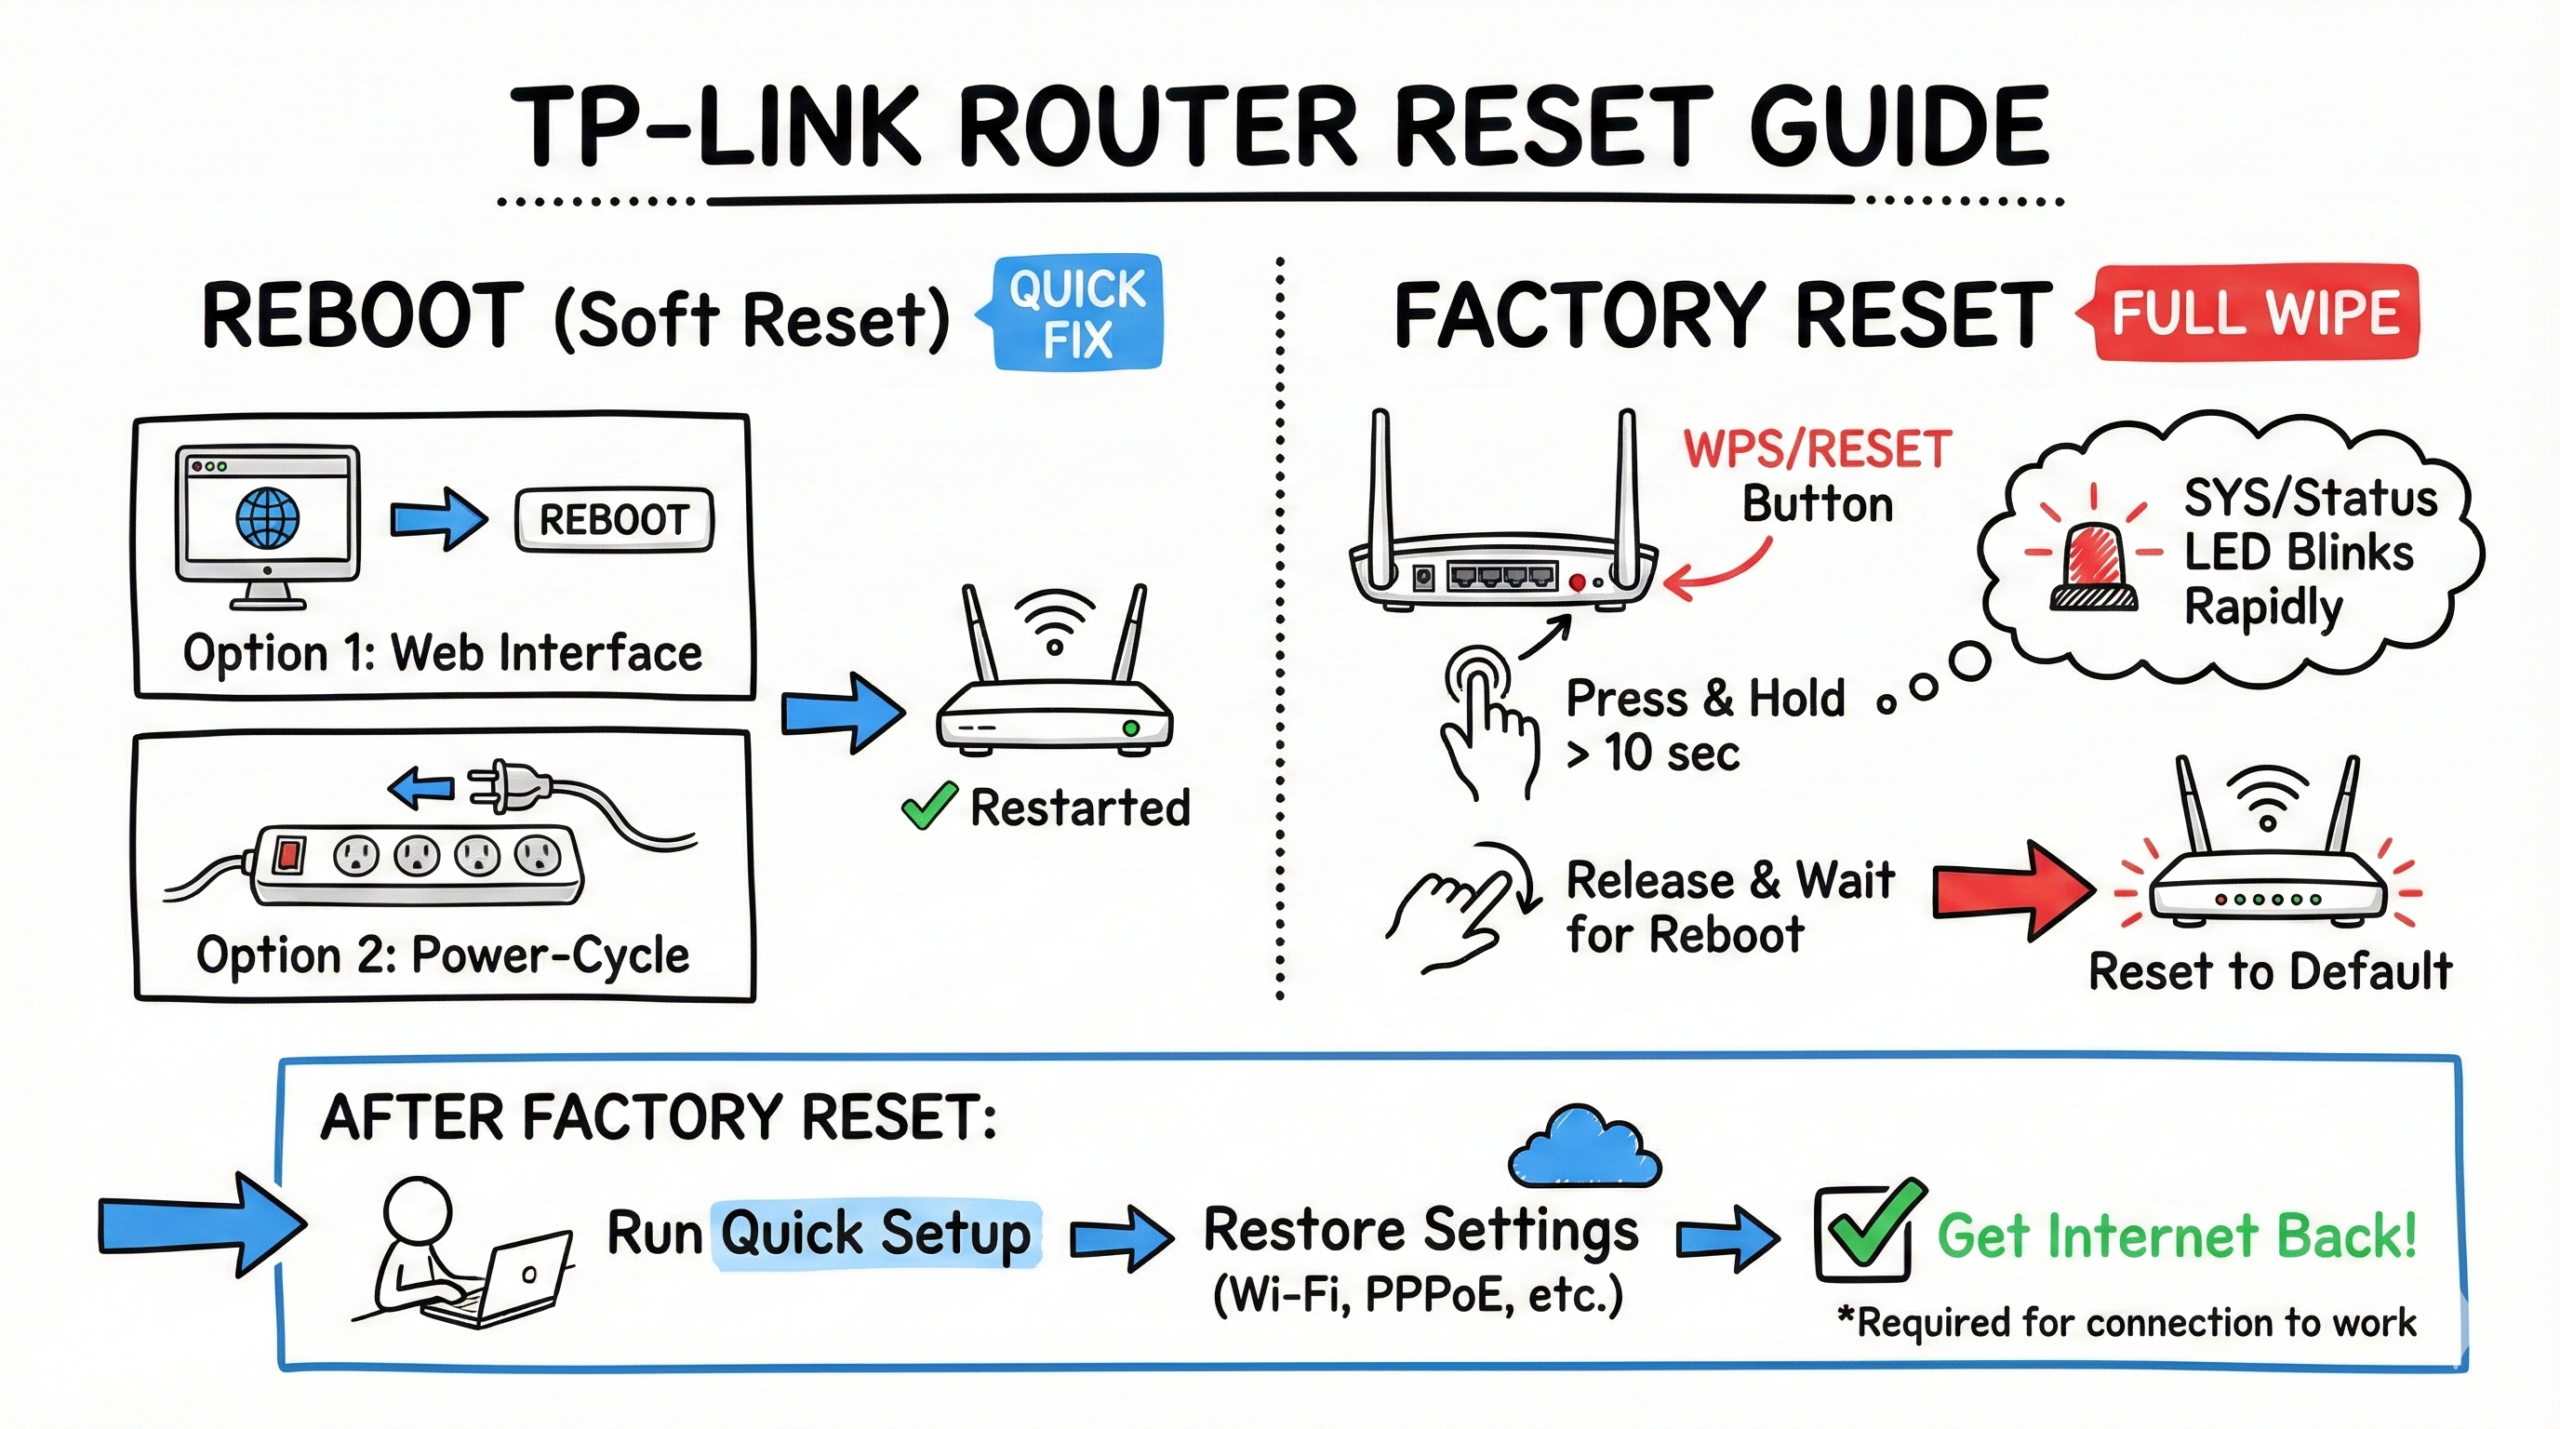
To reboot (soft reset), use the web interface or power-cycle the router. To factory reset, with power on, press and hold the WPS/Reset button for at least 10 seconds until the SYS/status LED blinks rapidly, then release and wait for the reboot.
After a factory reset, run Quick Setup to restore your internet (PPPoE/static settings and Wi‑Fi) before expecting the connection to work.
Resetting your TP-Link router is an essential skill for any home network administrator. Whether you’re troubleshooting connectivity issues, preparing to sell your router, or just want to start fresh with a clean configuration, knowing how to properly reset a TP-Link router is crucial.
In this comprehensive guide, we’ll walk you through the process of resetting your TP-Link router step-by-step. We’ll cover everything from identifying your specific router model to reconfiguring settings after the reset.
Jump Straight to Factory Reset Your TP-Link Router via the Reset Button section of the article.
Why Reset Your Router?
There are several reasons why you might need to reset your TP-Link router:
- Troubleshooting poor Wi-Fi performance or connectivity issues
- Preparing to sell or give away your router
- Recovering from a forgotten admin password
- Clearing out old or unwanted network settings
- Resolving issues after a firmware update
Whatever your reason, resetting your router can often help resolve stubborn network problems and give you a fresh start. Before you begin, back up your configuration, note any ISP credentials (especially PPPoE or static IP details), and have an Ethernet cable and a paperclip/SIM tool handy.
Identifying Your TP-Link Router Model
Before diving into the reset process, it’s important to identify your specific TP-Link router model. The exact steps for resetting can vary slightly between models, so knowing which one you have is key.
Locating the Model Number
You can find your TP-Link router‘s model number in a few places:
- On the label on the bottom or back of the router
- In the web-based administration interface
- On the original packaging or documentation
Common TP-Link router models include:
- Archer A7
- Archer AX50
- Archer C1200
- TL-WR940N
- TL-WR841N
Knowing your specific model will help you follow the correct reset steps and find relevant support resources if needed.
Why Model Numbers Matter
While the general reset process is similar across TP-Link routers, there can be slight variations between models. Some may have different button placements or require holding the reset button for a longer time.
Identifying your model ensures you follow the correct procedure and avoid potential issues. It also allows you to easily find your router’s default IP address, admin credentials, and support documentation.
See also: How to Reset Your TP-Link Extender
Types of Resets for TP-Link Routers
There are two main types of resets you can perform on a TP-Link router: a soft reset (reboot) and a hard reset (factory restore). Let’s look at the differences between the two.
Soft Reset (Reboot)
A soft reset, also known as a reboot, is like restarting your computer. It shuts the router down and restarts it without erasing any settings. Soft resets are useful for:
- Resolving minor connectivity issues
- Refreshing the router’s memory
- Applying changes to network settings
To perform a soft reset, you can power-cycle the router (unplug from power for about 10 seconds, then plug back in) or use the web interface’s reboot option. Use the web interface or app to reboot; the physical Reset or WPS/Reset button is not for a soft reboot—short press typically triggers WPS on combined buttons, and a long press performs a factory reset.
Hard Reset (Factory Restore)
A hard reset, also called a factory restore, erases all custom settings and restores the router to its original factory defaults. This is useful for:
- Resolving major connectivity issues
- Clearing forgotten admin passwords
- Selling or giving away your router
- Starting over with a clean configuration
Hard resets are performed using the WPS/Reset button on the router by pressing and holding it until the LED cue appears (details below). After a factory reset, you’ll need to run the setup wizard again.
Pros and Cons of Soft Reset vs Hard Reset
Soft resets are quick and easy but may not resolve more serious issues. They’re a good first troubleshooting step.
Hard resets are more powerful but erase all your custom settings. You’ll need to set the router up again from scratch afterward.
Steps to Perform a Soft Reset (Reboot)
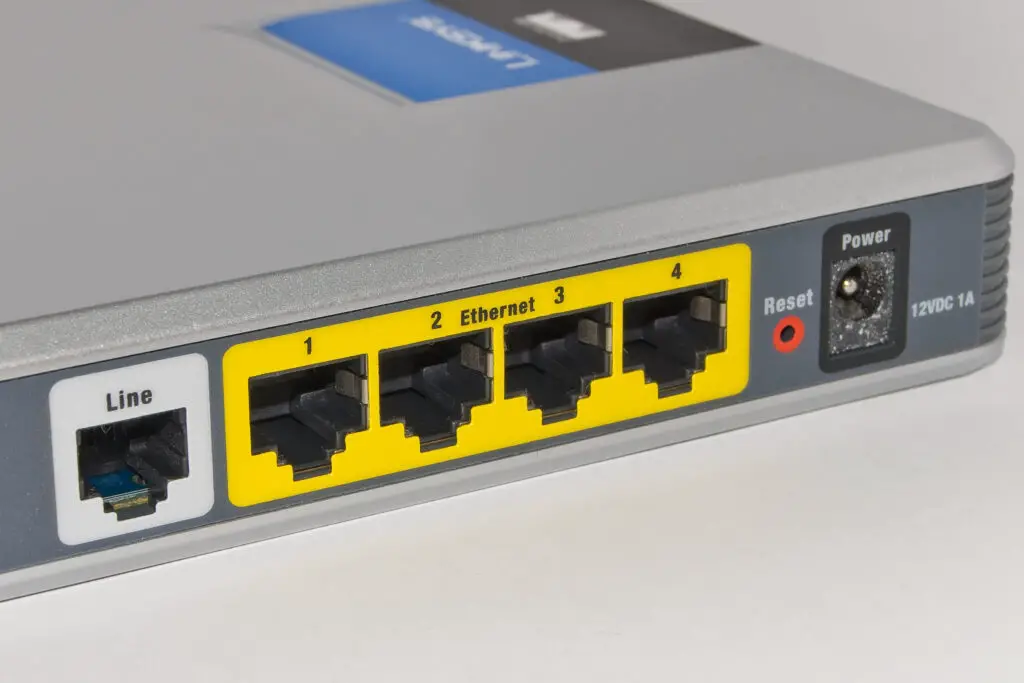
Locating the Reset Button
On most TP-Link routers, there are two buttons: a “Reset” button and a “Power” button. The Reset button is usually recessed and requires a thin object like a paperclip to press. It’s typically located on the back of the router.
Be careful not to confuse the Reset button with the WPS button, which is used for connecting WPS-enabled devices. On many models this is a combined WPS/Reset button: a short press triggers WPS pairing, while a long press (≥10 seconds) triggers a factory reset.
Using the Web Interface
You can also reboot most TP-Link routers through the web-based administration interface, or manage supported models with the TP‑Link Tether mobile app:
- Connect to the router’s network and open a web browser
- Enter the router’s default IP address (usually
192.168.0.1or192.168.1.1) - Log in with the admin username and password
- Navigate to the “System Tools” or “Administration” section
- Look for an option to reboot or restart the router
- Confirm the action and wait for the router to reboot
Waiting for the Reboot
After initiating the soft reset, wait for the router to fully reboot before trying to reconnect. This usually takes around 1-2 minutes. During this time:
- The router’s lights will flash
- Wired and wireless connections will be temporarily dropped
- The router will re-establish its connection to your modem or ISP
Once the lights are solid and connections are restored, your TP-Link router will be fully rebooted and ready to use.
Method 1: Steps to Perform a Hard Reset (Factory Restore) via Reset/WPS button
Locating the Reset Button
As mentioned earlier, the Reset button is usually recessed and located on the back of the TP-Link router. You’ll need a thin object like a paperclip or a SIM tool to press and hold it.
How Long to Hold the Reset Button
To perform a hard reset, with the router powered on, press and hold the WPS/Reset button for at least 10 seconds until the SYS/status LED blinks rapidly (or all LEDs flash), then release and wait for the reboot to complete.
Important: Releasing the button too early may trigger WPS or a brief restart rather than a full factory reset.
Router Behavior During Reset
During the hard reset process, your TP-Link router will:
- Erase all custom settings, including the admin password and Wi-Fi network details
- Restore factory default settings
- Clear WAN settings (PPPoE/static IP); you will need to re-enter ISP details during setup
This process usually takes around 1-3 minutes in total. Avoid unplugging or interrupting the router during this time.
Waiting for the Reset to Complete
Once the reset is initiated, wait for the router to fully reboot and come back online. You’ll know the reset is complete when:
- The power LED is solidly lit
- The Wi-Fi and internet LEDs are either lit or flashing normally
- You can connect to the router’s default Wi-Fi network (if it was enabled by default)
At this point, your TP-Link router will be restored to its factory default state and ready for reconfiguration. If your internet service requires PPPoE or a static IP, run Quick Setup and enter those credentials before testing connectivity.
Method 2: Reset via Router’s Web Interface
The second method involves resetting the router via the router’s web interface. You can also manage supported models with the TP‑Link Tether app (ensure your phone is on the router’s network and the device is bound to your TP‑Link ID). Here are the steps to reset the router using the web interface based on the provided information:
- Log into the Web-based Utility: Access the web-based management page of the TP-Link wireless router. For newer TP‑Link routers with the updated UI, you’ll create an admin password at first login (no default password). Older models may still use “admin”/“admin”. Check the bottom label for the correct access details.
- Navigate to Factory Default Restore Page: Once logged in, go to the Advanced > System Tools > Backup & Restore > Factory Default Restore page.
- Initiate Factory Restore: Click on the Factory Restore option and wait for the router to reboot to its factory default settings.
It’s important to ensure that the router is powered on before it restarts completely during this process.
Reconfiguring Router After Hard Reset
After performing a hard reset, you’ll need to reconfigure your TP-Link router‘s settings. This involves connecting to the router, accessing its web-based setup page, and customizing key options.
Connecting to the Default Network
Most TP-Link routers create a default Wi-Fi network after a hard reset, usually named “TP-Link_XXXX”. Look for this network on your device’s Wi-Fi settings and connect to it. The default password, if any, will be printed on the router’s label.
If the default network isn’t visible, you can connect to the router with an Ethernet cable instead.
Accessing the Web-Based Setup Page
With a connection established, open a web browser and enter the router’s default IP address. This is typically 192.168.0.1 or 192.168.1.1 or http://tplinkwifi.net/, but you can confirm it in the router’s documentation.
You’ll be prompted to create a new admin password. Enter a strong password and continue to the main setup page.
Configuring Essential Settings
From the web-based interface, navigate through the various sections to configure key settings:
- Set a new admin password: This step is usually mandatory after a reset. Choose a strong, unique password.
- Customize the Wi-Fi network: Set your preferred network name (SSID) and password. Consider enabling the latest security protocols like WPA3.
- Update the firmware: If a newer firmware version is available, update the router to ensure you have the latest features and security patches.
- Adjust other settings: Configure options like parental controls, guest networks, and port forwarding based on your needs. If you use OneMesh/EasyMesh or have the router bound to a TP‑Link ID, re‑add those pairings and bindings during setup.
Remember to save your changes and reboot the router if prompted.
Restoring from a Backup
If you previously backed up your TP-Link router‘s configuration, you can restore those settings after the reset:
- Log into the web-based interface
- Navigate to the “System Tools” or “Administration” section
- Look for a “Backup & Restore” or similar option
- Choose your backup file and confirm the restoration
- Wait for the router to apply the settings and reboot
This can save time compared to manually reconfiguring everything from scratch.
Troubleshooting Common Issues
Even after a reset, you might encounter issues with your TP-Link router. Here are some common problems and their solutions:
Router Not Resetting Properly
- Ensure you’re pressing the correct button (Reset, not WPS)
- Hold the button for the full ≥10 seconds until the SYS/status LED blinks rapidly
- Verify the router’s power LED is blinking, indicating a reset
- Contact TP-Link support if the issue persists
Unable to Access Web Interface
- Double-check the router’s IP address
- Ensure your device is connected to the router’s network
- Try accessing via an Ethernet cable instead of Wi-Fi
- Clear your web browser’s cache and cookies
- Temporarily disable firewall and security software
- Try http://tplinkwifi.net as well as
192.168.0.1or192.168.1.1; if the hostname doesn’t resolve, use the IP address
Internet Connectivity Problems
- Check that all cables are properly plugged in
- Verify your modem is online and functioning
- Contact your internet service provider (ISP) to rule out service outages
- Reset the modem in addition to the router
- If you performed a factory reset, rerun Quick Setup and re-enter PPPoE username/password or static IP/gateway/DNS provided by your ISP
Contact TP-Link Support
If you’ve tried other troubleshooting steps and still have persistent issues, it might be time to contact TP-Link support directly. They can provide model-specific guidance and help identify less common problems.
You can reach TP-Link support via:
- Live chat on the official website
- Phone support hotline
- Email support ticket system
- Official community forums
Before contacting support, gather details like your router model, firmware version, and a description of the issue. This will help them provide faster and more targeted assistance.
Tips to Avoid Needing a Reset
While resetting can resolve issues, it’s best to avoid needing one in the first place:
- Keep your router’s firmware updated
- Configure strong wireless security settings
- Don’t make unnecessary changes to core settings
- Regularly back up the router’s configuration
- Use a reliable power source and surge protector
By following these tips, you can minimize the chances of serious problems that require a full reset.
Importance of Backing Up Router Config
Before making significant changes or performing a factory reset, it’s wise to back up your TP-Link router‘s configuration. This saves all your current settings, allowing you to quickly restore them later if needed.
How to Back Up
- Log into the router’s web interface
- Go to the “System Tools” or “Administration” section
- Find the “Backup & Restore” option
- Choose “Backup” and save the configuration file
The exact steps may vary slightly depending on your router model and firmware version.
Restoring from a Backup File
To restore settings from a backup file:
- Access the router’s web interface
- Navigate to the “System Tools” section
- Select “Backup & Restore”
- Choose “Restore” and select your backup file
- Confirm the action and wait for the router to reboot
The router will load the saved configuration, restoring your previous network name, password, and other customizations.
Backup Regularly
It’s good practice to back up your router’s settings regularly, especially after making significant changes. Most experts recommend backing up at least once per month, as well as before and after major updates.
Store your backup file in a secure location, like a password manager or an encrypted USB drive. Avoid keeping it on the same network as the router for optimal security.
Conclusion
Resetting your TP-Link router is a powerful troubleshooting tool that can resolve various network issues. By following the steps outlined in this guide, you should now be able to confidently perform both soft and hard resets as needed.
Remember to identify your router model, understand the different reset types, and reconfigure the router after a factory reset. Regular backups can streamline the process and minimize downtime.
If resetting doesn’t solve your problem, don’t hesitate to explore other options like firmware updates, physical troubleshooting, and contacting TP-Link support.
With these best practices in mind, you’re well-equipped to keep your TP-Link router running smoothly and efficiently. Happy networking!
Frequently Asked Questions (FAQs)
Q: Will resetting my router erase my custom settings?
A: A soft reset (reboot) will not erase your settings. A hard reset (factory restore) will erase all custom settings and restore the router to its default configuration.
Q: How long should I hold the Reset button for?
A: Hold the WPS/Reset button for at least 10 seconds until the SYS/status LED blinks rapidly. Then release and wait for the router to reboot.
Q: What should I do if I can’t access the router’s web interface?
A: First, ensure you’re using the correct IP address and that your device is connected to the router’s network. If the issue persists, try clearing your browser cache, disabling security software, connecting via Ethernet, or using http://tplinkwifi.net instead of the IP address.
Q: How often should I back up my router’s configuration?
A: It’s recommended to back up your router’s settings at least once per month and before and after significant changes or firmware updates.
Q: Will I lose my internet connection during the reset?
A: Yes, your internet connection will be temporarily lost during the reset process. You’ll need to reconnect your devices once the router has restarted. If you performed a factory reset, complete Quick Setup (including PPPoE/static IP details) before testing internet access.
Q: Do I need to notify my ISP about the reset?
A: No, you don’t need to inform your ISP about resetting your router. The reset process only affects your local network settings.
Q: What’s the difference between restarting and resetting a router?
A: Restarting your router simply turns it off and on again, while resetting erases all custom settings and restores the device to its factory defaults.
- pfSense 10G Home Lab Setup: Complete Hardware Guide (2026) - April 1, 2026
- Best Budget Home Lab Setup Under $300 (2026): Complete Starter Stack - March 30, 2026
- Best Modems for Spectrum: Top DOCSIS 3.1 Picks That Actually Work - March 28, 2026